Project Date: 2024 – Current (WORK IN PROGRESS!)

Photo: Ethan Berman
Project Abstract:
Design a lightweight single person mountaineering tent that can be used in all 4 seasons.
Background:
I enjoy embarking on solo mountaineering trips when I can’t find partners or when I’m part of an odd-numbered group (where two people share a tent and the third person usually has their own shelter). Currently, the tent market doesn’t offer many good, cost-effective solutions for single-person mountaineering tents. The only ones I’m aware of are the Samaya Radical1 (MSRP $1,354) or the Hilleberg Akto (MSRP $690). While both of these tents boast fantastic designs and quality, I find them to be extremely expensive for what they offer.
Back in 2022, I crafted a two-person A-frame style tent for backpacking in the northeast. What made this project great was the ability to incorporate features I wanted, such as internal storage options, and to select materials that balanced weight and cost. Similar tents would typically retail for an MSRP of $300, but it cost me less than $100 in raw materials to create mine. This project served as an excellent introduction to tent-making, allowing me to learn specific construction techniques used in tents and apply them in practice. Since then, I’ve been eager to create a 4-season tent.

A tent I designed and made back in 2022
For my 4-season trips, I currently use a Big Agnes Three Wire Hooped Bivy. While this bivy is lightweight and great for fast missions, it becomes challenging during severe storms or high winds. When the weather turns rough, staying warm and comfortable becomes a compromise. There’s no way to shield oneself from the elements while sitting up at camp without exposing oneself to the outside. While this setup works well for fair weather and quick, lightweight trips, having headroom to sit up and protect gear in inclement weather is essential for longer expeditions, ensuring that enjoyable type II fun doesn’t turn into less pleasant type III fun. Although condensation does form inside, the three-layer fabric helps reduce this issue. However, during extended trips, a wet sleeping bag diminishes insulation effectiveness and could pose a threat in colder conditions.

My current setup on a solo trip on Mt. Shasta, CA
Bivy Sack:
Pros:
- Lightweight: Bivy sacks are generally lighter than tents, making them ideal for minimalist or fast-and-light alpine missions.
- Compact: Bivy sacks pack down very small, saving space in your backpack.
- Quick setup: Bivy sacks are easy and quick to set up, requiring minimal effort and time.
- Warmth: Bivy sacks offer a more enclosed space around your body, which can provide additional warmth compared to tents.
- Versatility: Bivy sacks can be used in more confined spaces where pitching a tent may be difficult, such as narrow ledges or small bivouac spots.
- Condensation management: In cold conditions, condensation is less likely to form inside a bivy sack compared to a tent, as there’s less airspace to trap moisture.
- Cost: Bivy’s can be acquired for less than $300.
Cons:
- Limited space: Bivy sacks offer minimal space for gear storage and movement, which can be uncomfortable during extended periods or in poor weather.
- Lack of protection: Bivy sacks provide minimal protection from the elements compared to tents, leaving you more exposed to wind, rain, and snow.
- Claustrophobic: Some people may find bivy sacks too restrictive and claustrophobic, especially during extended stays or bad weather.
- No sitting space: Unlike tents, bivy sacks typically don’t have enough space to sit up comfortably, making activities like cooking or reading more challenging.
- Limited ventilation: Ventilation can be a problem in bivy sacks, leading to potential condensation buildup and discomfort in humid or warm conditions.
- Gear exposure: Gear stored outside the bivy sack may be more exposed to the elements, risking damage or getting lost.
Single-Person Tent:
Pros:
- Shelter: Tents offer better protection from the elements, including rain, wind, and snow, keeping you and your gear dry and sheltered.
- Space: Single-person tents provide more space for gear storage and movement, allowing you to sit up comfortably and perform tasks inside the tent.
- Comfort: Tents offer a more comfortable sleeping environment, with space to move around, change clothes, and organize gear.
- Privacy: Tents provide more privacy compared to bivy sacks, allowing you to change clothes or attend to personal tasks without being exposed.
- Ventilation: Tents usually have better ventilation systems, reducing condensation buildup and improving air circulation for a more comfortable sleeping environment.
- Gear storage: Tents offer vestibules or gear lofts for storing gear outside the sleeping area but still protected from the elements.
Cons:
- Weight: Single-person tents are generally heavier than bivy sacks, adding more weight to your backpack, which can be a concern for longer or more technical mountaineering trips.
- Bulk: Tents take up more space in your backpack compared to bivy sacks, limiting pack space for other essential gear.
- Setup time: Tents typically take longer to set up compared to bivy sacks, requiring more effort and time, which can be inconvenient in rapidly changing weather conditions.
- Fragility: Tents can be more prone to damage from sharp rocks or ice, requiring more care and maintenance in rugged mountain environments.
- Limited usability: Tents may not be suitable for all bivouac spots, especially in tight or exposed locations where pitching may be challenging.
- Heat retention: In warmer conditions, tents may trap more heat than bivy sacks, leading to potential discomfort and restless sleep.
- Cost: Single person mountaineering tents are typically more than $500.
The goal of this project is to do the following:
- Design a 4 season capable, single person mountaineering tent to withstand extreme conditions found in the alpine.
- Have it cost at most $350.
- Be compact and weight less than 2lbs (poles included)
First, I plan to tackle the design and do research in potential materials to balance cost and weight – after that, I plan to make a small scale prototype – then possibly a full size one with inexpensive prototyping materials. Then, after getting some feedback, redesign and send the parts to be laser cut to assemble a final version.
Tent Design:
There are many possible shapes and configurations of a tent, but all tents usually share the following design features (or may only have a certain combination depending on what the design is trying to go for)
- Main Tent Body Fly/Canopy: Protects you from the elements.
- Outer Rain Fly: Provides extra weather protection and reduce condensation on inner tent body.
- Supporting Structure: (can be poles, hiking pole, trees) – gives shape to the tent.
- Tie down points: Ensures the tent doesn’t fly away or shift when inside.
- Guy lines: Provides extra anchoring for high wind events.
- Waterproof Floor/Bathtub: Protects the user from moisture from the ground and protects the bottom of the user’s sleeping pad/backpack.
- Vents: Provides airflow to reduce condensation from building insi.de
- Vestibules: provides overhead shelter for items that can not fit inside the main tent area.
Tents come in a vaPiety of shapes, each offering unique advantages in terms of stability, interior space, and weather resistance. Common tent shapes include:
- A-Frame: Simple triangular shape with sloping sides, offering ease of setup and wind shedding capabilities.
- Dome: Rounded shape with multiple crossing poles, providing stability and headroom for occupants.
- Tunnel: Long, cylindrical shape with flexible poles arched over the tent’s length, maximizing interior space and wind resistance.
- Geodesic: Complex dome shape with intersecting poles, offering exceptional stability and strength in harsh weather conditions.
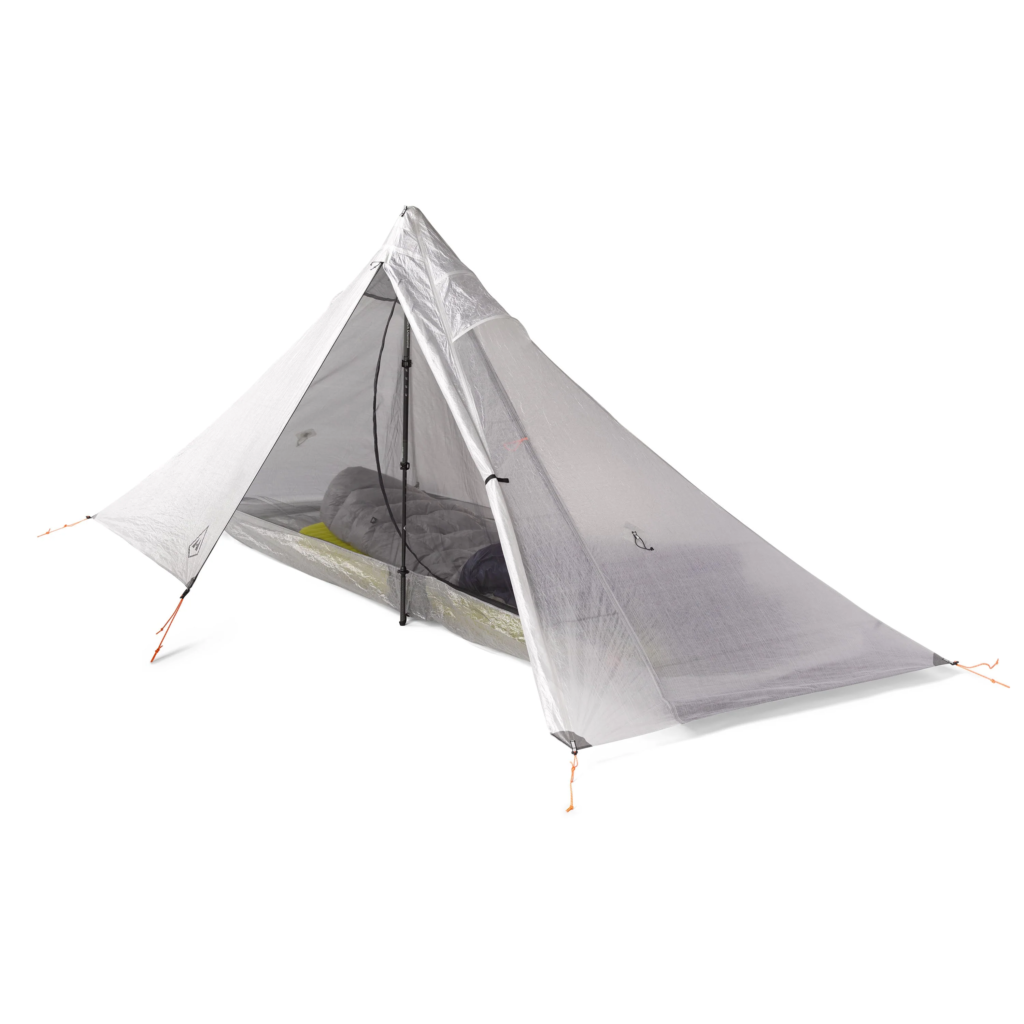


Tents come in all different shapes and sizes for different applications
Our tent must withstand extreme weather conditions such as high winds and heavy precipitation, be easy to set up, and provide headroom for a single occupant while maintaining a low profile to fit on small ledges. Additionally, its construction needs to be simple to reduce material costs and assembly time. These requirements naturally lead us to consider the dome shape design. This shape is easy to create a pattern for, reduces the number of pieces that need to be sewn together, offers excellent stability in harsh weather, and can provide ample headroom for comfortable sitting.
Although a tunnel shape was considered, achieving the same headroom as a dome shape tent would require the tunnel tent to be almost twice as wide, limiting its suitability for trips with steeper terrain. As for features, our tent can include vents at the top and robust tie-down/guy-line points at the corners.
Our tent will be a single-wall design, meaning there is no separate main body and exterior fly. While this significantly reduces weight and pack size, it does increase the likelihood of condensation forming inside the tent. However, this issue can be addressed through the inclusion of vents and careful selection of tent materials.
Tent Materials
In the process of designing anything, having a general idea of the materials you plan to use can guide the design and allow for potential innovation. However, it’s crucial not to be overly committed to specific materials during the design phase, as they may ultimately prove inadequate for the intended application. As a sole operator, my options are limited to commercially available fabric and tent pole materials.
Waterproof fabrics commonly used in tents include nylon and polyester, each with its own set of advantages and disadvantages:
Nylon:
- Strength and Durability: Nylon is known for its exceptional strength-to-weight ratio, making it a popular choice for tent fabrics. It is highly durable and resistant to abrasion, making it suitable for rugged outdoor use.
- Water Resistance: Nylon tent fabrics typically have good water resistance, especially when treated with coatings such as polyurethane or silicone. However, nylon may absorb some water over time, which can affect its performance in prolonged rain or wet conditions.
- UV Resistance: Nylon fabric is susceptible to degradation from prolonged exposure to ultraviolet (UV) radiation. Without proper treatment or UV inhibitors, nylon tents may experience fading, weakening, and deterioration over time when exposed to sunlight.
- Packability and Weight: Nylon tent fabrics are lightweight and packable, making them ideal for backpacking and other activities where minimizing weight and bulk is crucial.
Polyester:
- Durability: Polyester is known for its excellent durability and resistance to stretching, shrinking, and wrinkling. Polyester tent fabrics are less prone to abrasion and tearing compared to nylon, making them a durable choice for long-term use.
- Water Resistance: Polyester tent fabrics are naturally hydrophobic, meaning they repel water and are less likely to absorb moisture compared to nylon. Additionally, polyester fabrics can be treated with coatings or laminates to enhance water resistance further.
- UV Resistance: Polyester is inherently more UV-resistant than nylon, making it less prone to degradation from sunlight exposure. Polyester tent fabrics are less likely to fade, weaken, or deteriorate over time when exposed to UV radiation.
- Weight and Packability: While polyester tent fabrics are generally heavier than nylon, advances in fabric technology have led to the development of lightweight and packable polyester materials suitable for backpacking and other outdoor activities.
I am going to be looking mostly at nylon materials, as the requirement for high strength at a low weight takes priority over polyester.
Tent Floor
The tent floor needs to be made from a durable and highly waterproof material. The tent floor sees direct contact with the ground and the user, so a material with high abrasion resistance and waterproofing is required.
Tent Body
The tent body does not see much abrasion as the tent floor, but needs to be strong in the warp and weft direction. It needs to be highly waterproof, especially in the 4 season conditions it sees. A possible innovation that can be done here is to use 3 layer waterproof materials similar to that of a bivy – however since the construction of these fabrics is more complicated, weight and cost can go up to where it does not meet our price point or weight goal. Also, the breathability gains we may possible see in this 3 layer fabric may not make much sense in a tent than what is commonly seen in a bivy.
Tent Poles
The tent poles need to be strong enough to withstand high winds, as well as be flexible enough to bend in the dome shape. Traditionally, tent poles are aluminum, but with the reduction in cost to manufacture carbon fiber poles, there could be a potential weight saving there. Technically speaking, carbon fiber is five times as strong a steel while being substantially lighter. A lower cost alternative is fiberglass poles.
Using Solidworks to Design the Tent
Conventional parametric CAD programs aren’t typically tailored for designing soft goods. As an engineer by profession, I’ve found soft goods and pattern-making-specific CAD programs to be unintuitive and challenging to dimension. However, through experimentation, I’ve developed a workflow to design soft goods like backpacks, accessories, and tents in Solidworks. This enables me to create 2D patterns that I can either print out or send to a laser cutting service.
Using a parametric CAD program has its advantages, as it allows for precise dimensioning and the establishment of relationships between sketches. Unlike typical sewing pattern programs, which lack the ability to specify dimensions such as length and angle or establish relationships like tangency or parallelism, parametric CAD programs offer this functionality. Consequently, when editing one part of a pattern, other parts can update and adjust their relationships automatically based on predefined parameters.
However, parametric CAD programs have limitations when it comes to tasks such as creating darts and more complex curves and shapes.
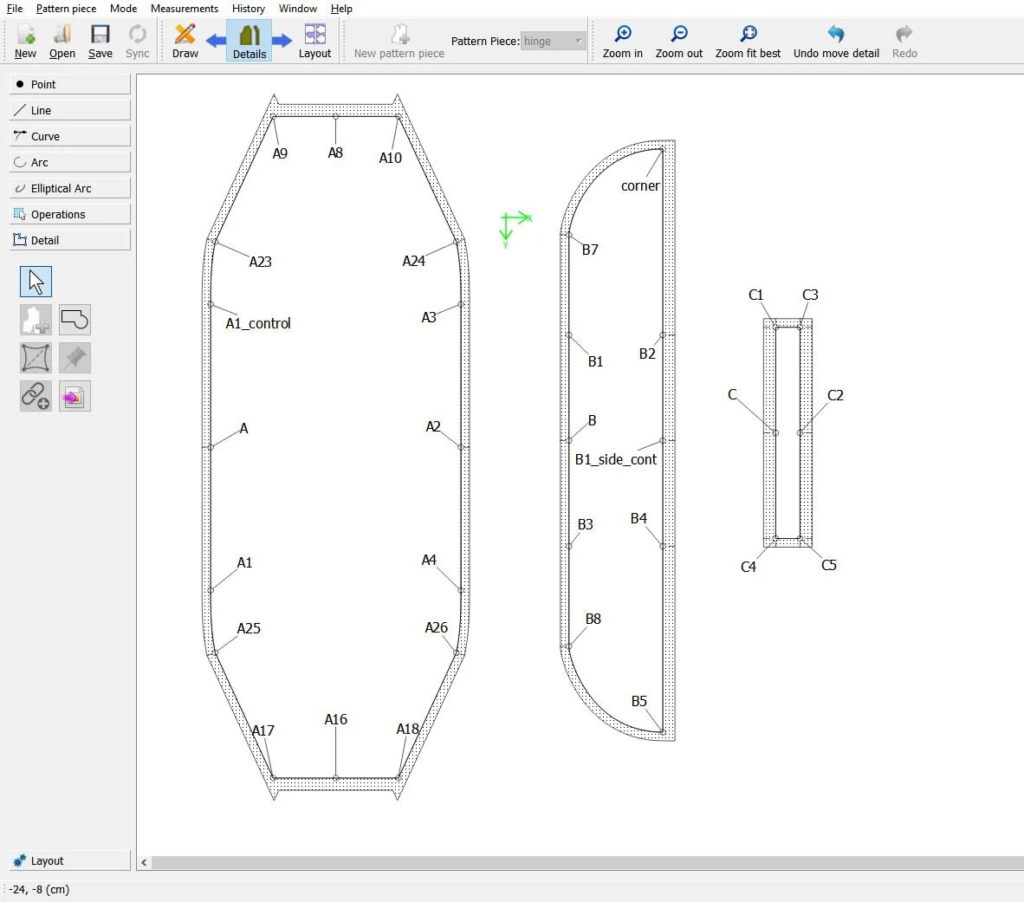
Arbitrary dimensions – makes my engineering head explode!
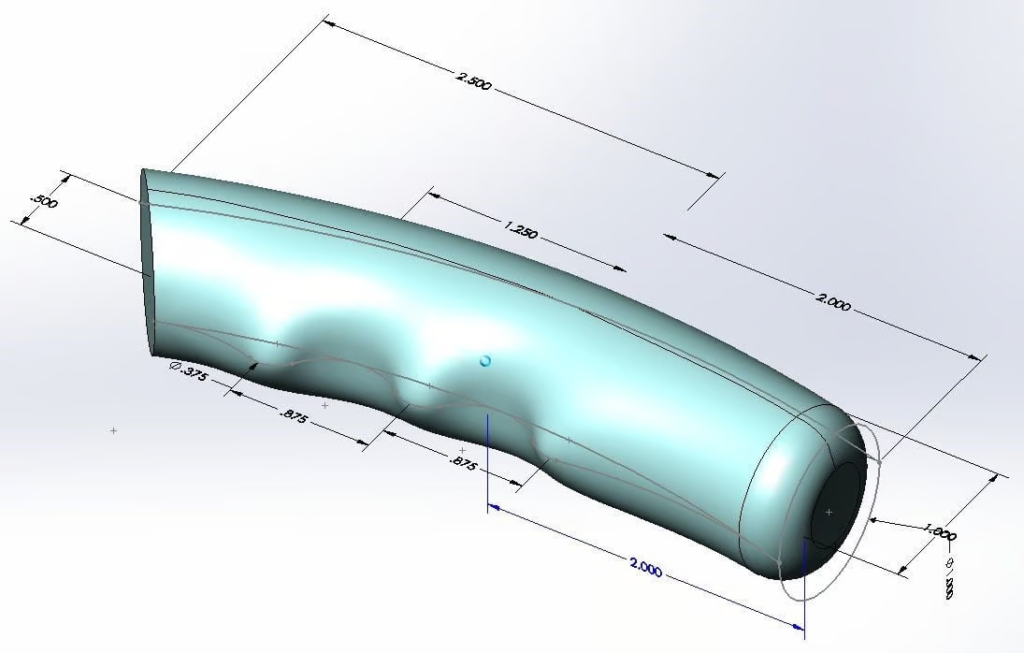
Dimensions and referencing – yay!
In Solidworks, the key lies in utilizing the surfacing tool. While CAD programs primarily deal with “Solids” — shapes with four sides and no infinitely thin surfaces — the surfacing tool allows for the creation of two-sided objects that naturally conform to shapes. With this tool, surfaces can be manipulated using built-in tools and even flattened to generate 2D patterns.
However, there are limitations to using the surfacing tool. It’s essential to ensure that the geometry created is physically feasible for sewing and cutting. This requires some intuition about what can be realistically cut from a piece of fabric. For instance, convex features on a surface are typically achieved through methods like darts or using elastic materials.
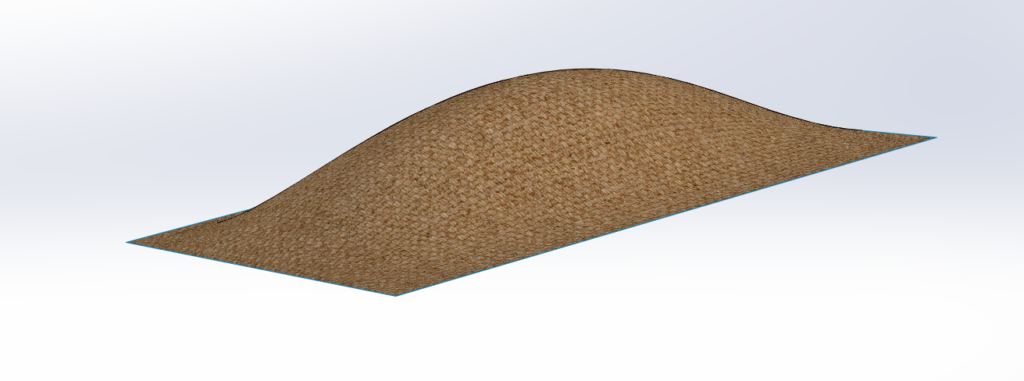
Near Impossible fabric feature that can not be cut from a fabric roll
To design the tent, the first step was determining its dimensions: length, width, and height. While standard sleeping pads are typically 183 cm long and 56 cm wide, I opted for a more spacious design. To accommodate winter-specific pads and provide extra clearance, I set the floor dimensions at 200 cm x 70 cm. Additionally, I incorporated slight catenary curves along the edges to ensure the tent body is taut when fully assembled. These curves account for the natural stretch of fabrics in both the warp and weft directions.
The tent’s height was set at around 90 cm to allow for comfortable sitting for an adult occupant. The dome shape follows a normal arc similar to what a tent pole can bend, ensuring structural stability and ease of assembly.
In terms of the tent’s layout, I decided to place the door on the side for convenient entry into the tent and sleeping bag. This configuration also allows for easy passage of a rope to the occupant inside, if needed. Additionally, I’m considering further modifications to include a dedicated rope pass-through inside the tent for added versatility and functionality. This would enhance the tent’s usability, particularly in scenarios where being secured to the mountain with a rope is essential.
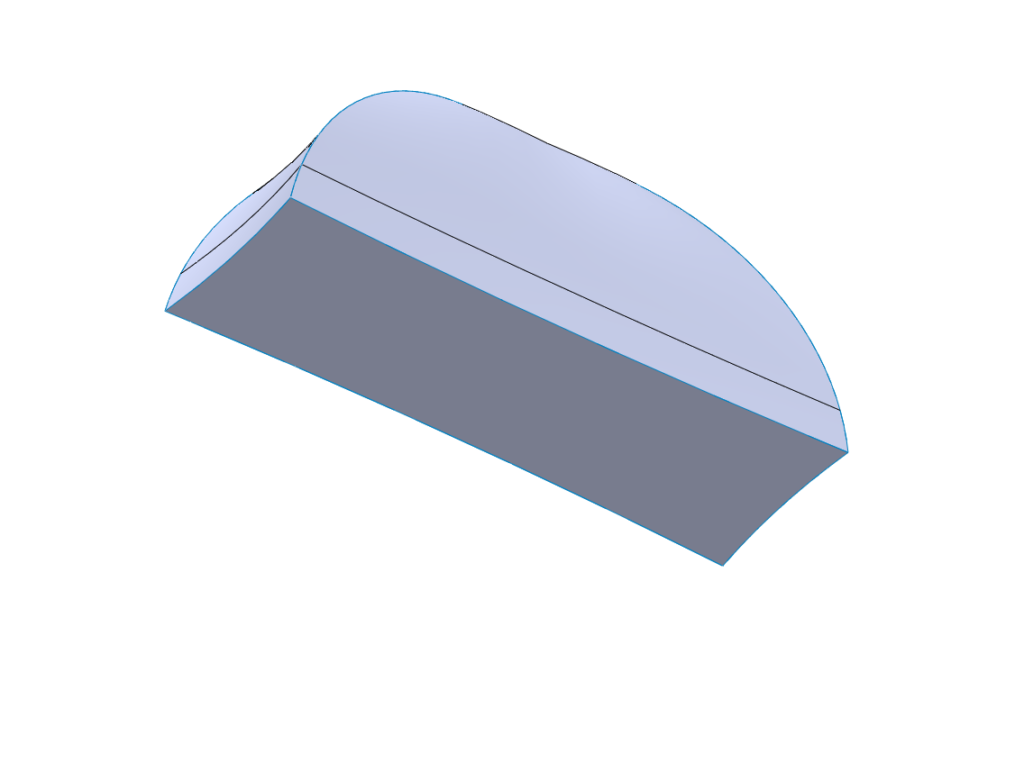

Tent floor with catenary cut sides
What’s cool about the surfacing tool is its ability to flatten surfaces. When you use the surface flatten tool, you convert the surface profile to a sketch and then add your seam allowance using the “Offset Entities” tool. It’s also possible to have some sides with a larger seam allowance than others using this tool. This makes it easy to create flat 2D files of the surfaces that can be sent to a shop for material cutting.


Converting the 3D model to its 2D components

Initial CAD model of the tent – missing the tent poles
Whats Next?
Now that I have the basic shape of the tent, I am currently conducting research on tent poles. There are a lot of factors I need to consider, such as choosing the right diameter and material, determining the maximum curvature a pole combination can achieve, and then modeling it in CAD. From there, I will either 3D print a small-scale model or sew a scaled-down version and place 3D printed figurines, such as a human, sleeping pads, and other items, to check the scale before moving on to the full-size prototype. I will post updates on this page as I make progress.